By Martin Harris.
Grizzly G0548ZP: Setup, Filter Cleaning, and Upgrades
The Grizzly G0548ZP is a 2 HP single-stage dust collector with a 1 micron canister filter. It runs on 240V only, goes together in about 45 minutes according to Grizzly, and needs very little upkeep beyond turning the canister cleaning handle and swapping the plastic bag underneath.
This page is an owner's guide built from Grizzly's G0548ZP manual (the September 2022 edition covering machines made August 2018 and later) and Grizzly's product listing. It covers what comes in the box, the assembly order, the wiring, routine cleaning, and the upgrades that make sense in a garage shop. For my overall take on the machine, read the Grizzly dust collector review.
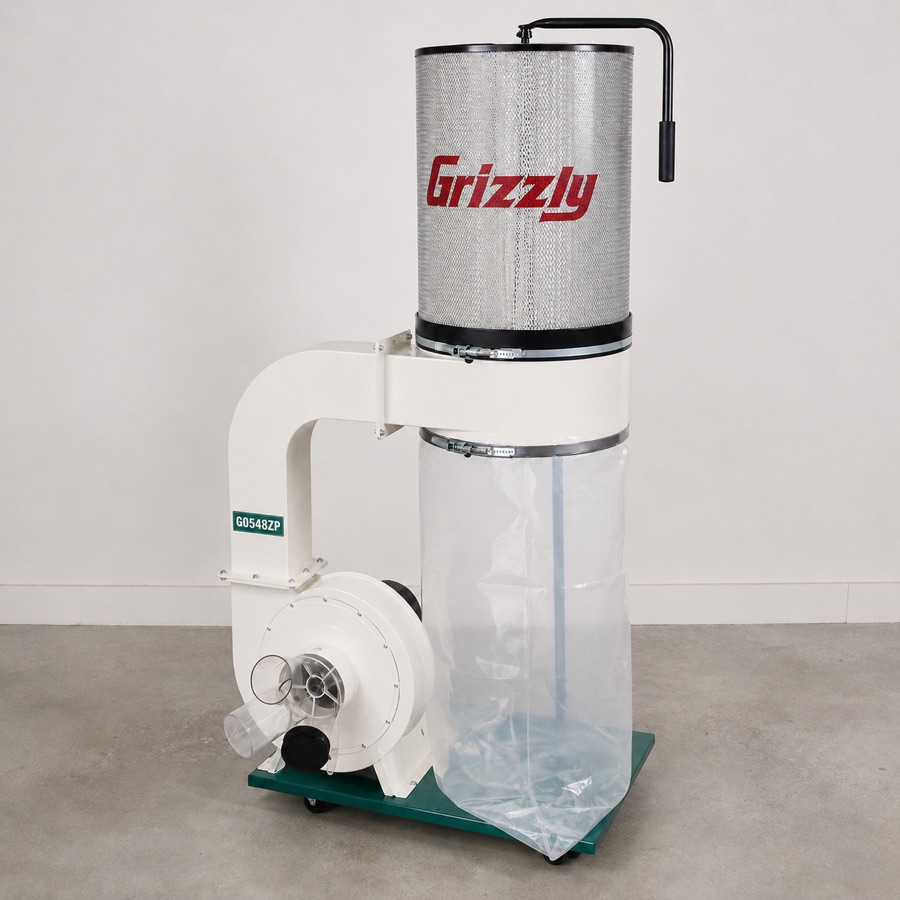
G0548ZP specs from the manual
| Spec | G0548ZP |
|---|---|
| Motor | 2 HP, 240V, single-phase, 9A |
| Circuit and plug | 15A circuit, NEMA 6-15 plug included |
| Air suction capacity | 1,700 CFM |
| Max static pressure | 10 in. w.c. |
| Impeller | 12-3/4 in. cast aluminum, radial fin |
| Main inlet | 6 in., with an adapter to three 4 in. inlets |
| Filter | 1 micron canister, 19-5/8 in. diameter x 23-5/8 in. long |
| Collection capacity | 4.5 cu. ft. |
| Lower bag | Clear plastic, 19-1/2 in. diameter x 33 in. long |
| Size and weight | 37 x 27 x 71 in., 145 lb |
| Switch | Safety paddle switch |
| Warranty | 1 year |
Source: Grizzly Industrial G0548ZP owner's manual, machine data sheet. Size is side to side, front to back, and height.
What comes in the box
The G0548ZP ships in two cartons. Grizzly's manual lists the first box at 126 pounds and the second at 29 pounds. Plan on a helper to unload the big one. Before you start, lay everything out and check it against the inventory list in the manual. The parts I'd look for first:
- Box 1: the motor and impeller assembly, the inlet connector (6 inch with three 4 inch ports), a collection bag clamp, two collection bags, and the hardware bag.
- Box 2: the canister filter, the foam strip bag, the canister belt clamp, and the canister cleaning handle.
Grizzly's manual notes that the inlet adapter was updated to a new part (P0548ZP029V2), so yours may look different from older photos online. If a part is missing, Grizzly asks you to have the serial number and manufacture date ready when you call.
Assembly order
Grizzly lists assembly at 45 minutes. Almost every fastener is a 5/16-18 x 1/2 inch flange bolt, so one wrench or socket covers most of the job. Here is the order from the manual, in plain terms:
- Flip the base upside down on a protected surface and bolt on the casters (16 bolts).
- Turn the base upright and bolt the motor and impeller assembly to it (4 bolts).
- Set a rubber gasket around the impeller outlet rim, then bolt the outlet connector to it (8 bolts).
- Bolt the canister support to the base (2 bolts).
- With a helper, put the second gasket on the outlet connector, set the collector body on it, and bolt it down (8 bolts). Then fasten the top of the canister support to the collector (2 bolts).
- Stick the wide foam strip around the outside top of the collector and trim it so the ends meet evenly.
- Slide the cleaning handle onto the canister shaft, line the hex bolt up with the flat spot on the shaft, and tighten it.
- Put the belt clamp around the base of the canister, set the canister on the collector, and tighten the clamp so it squeezes the foam evenly.
- Apply the narrow foam strip to the bottom of the collector, hang a collection bag on the hooks, and tighten the bag clamp over the foam.
- Fit the inlet connector over the impeller intake and secure it with the single tap screw.
The foam strips are the seals. Take your time trimming them so the ends butt together with no gap. A leak at the canister or bag clamp lets fine dust out and pulls air in, which weakens suction at the tool. If suction ever feels low, check those seals first, then work through my weak suction troubleshooting guide.
120V vs 240V: this one is 240V only
This is the most common surprise with the G0548ZP. The manual lists it as 240V, single-phase only, with a 9 amp full-load current. It cannot be rewired for 120V. Grizzly calls for a dedicated 15 amp, 240V circuit and includes a NEMA 6-15 plug. That plug won't fit a standard 120V household outlet.
The same manual covers the G1028Z2, a 1.5 HP bag model that is prewired for 120V and can be converted to 240V. People mix the two up when they read the manual, so make sure you are on the G0548ZP pages. Grizzly also says it does not recommend an extension cord, since voltage drop can shorten motor life.
If your garage has no 240V outlet, budget for an electrician to run one before the collector arrives. My 240V dust collector wiring guide explains what to ask for.
Cleaning the canister with the paddle handle
Grizzly's daily checklist includes cleaning the canister. The method is simple: with the machine off, move the cleaning handle on top of the canister back and forth. That shakes paddles inside the pleats, and the dust drops down into the clear bag. Doing it at the end of each work session keeps the dust from settling and packing into the pleats.
The manual gives one firm warning. Do not use compressed air or liquids on this filter, because both damage the pleats. If the handle won't free the dust, Grizzly allows a soft brush on the inside of the canister and nothing harsher. That differs from some other brands' advice, so follow Grizzly's instructions for this filter.
When a canister is worn out, the replacement is Grizzly model H5783. Grizzly also notes that the collector is not an air cleaner and recommends a ceiling hung shop air filter to catch the fine dust that stays in the room. My filter cleaning guide covers when a canister is past saving.
Changing the collection bag
The lower bag is clear plastic, so you can see when it is getting full. Grizzly says to empty it regularly because a full bag cuts efficiency. The steps from the manual:
- Unplug the machine.
- Put on safety glasses and a respirator. Fine dust puffs out when the bag comes off.
- Release the clamp holding the bag and unhook the bag from the collector.
- Close the top of the bag tightly and throw it away according to local rules.
- Hang a new bag on the hooks and tighten the clamp over the foam strip.
Replacement plastic bags are Grizzly model T20543. Changing the bag outside or next to the open garage door keeps the puff of dust out of the shop. For mask choices, see my woodworking respirator guide.
Hose and duct hookups
The collector has a 6 inch main inlet. The included adapter splits it into three 4 inch ports. Grizzly's manual says the machine can work as a mobile collector on hoses or as a stationary collector feeding ductwork.
- Use metal duct where you can. The manual recommends metal for the main and branch lines, with short flex hose at each machine.
- Ground plastic duct. Grizzly warns that ungrounded plastic duct can build static charge and create a fire hazard. It sells an anti-static grounding kit (G4679).
- Skip dryer vent hose. The manual says not to use it in a dust collection system.
- Close unused ports. Three open 4 inch ports split the airflow three ways. Put a blast gate on each port and open one at a time.
If you do run PVC, read my guide to grounding PVC dust collection before you hang it. For layout rules, see dust collection ductwork.
Upgrades worth doing
A separator ahead of the collector. A cyclone separator sits between your tool and the collector and drops most chips into a bin before they reach the canister. The canister stays cleaner, and planer shavings stop filling the bag so fast. The tradeoff is added resistance, which means a little less airflow at the tool. The Oneida Super Dust Deputy is built for 4 inch collectors, and this site lists it at $265. A shop built Thien baffle costs less. Compare them in Dust Deputy vs Thien baffle.
A remote switch. The stock paddle switch sits on the machine, which means a walk across the shop every time you start a cut. A remote saves that walk. Buy one rated for 240V and for at least the collector's 9 amp motor load, with plugs and receptacles that match the 6-15 outlet. My dust collector remote guide lists what to check.
Bigger hose. The 6 inch inlet is the collector's full opening, and the 4 inch adapter narrows it right away. If you mostly use one big tool, like a table saw or planer, run 6 inch hose or pipe from the inlet and step down to 4 inch near the machine. Grizzly sells 4, 5, and 6 inch rigid metal flex hose (H7215, H7216, H7217) and metal duct starter kits in the same three sizes. See 4 inch vs 6 inch dust collection for why this helps.
Blast gates. Grizzly lists a 4 inch plastic blast gate (G1843). One gate per branch keeps the airflow going to the tool you are running. My blast gate install guide walks through placement.
Warranty, parts, and where to buy
Grizzly's manual gives a 1 year warranty to the original buyer and requires proof of purchase and a return number before sending anything back. Grizzly's tech support line in the manual is (570) 546-9663. This site lists a street price of $755 as of 2026-10-24, and prices change. You can check the current price of the Grizzly G0548ZP at Grizzly. If you're still deciding between brands, read Grizzly vs Jet dust collector, and for the bigger plan see my complete guide to small shop dust collection.
FAQ
Can the Grizzly G0548ZP run on 120V?
No. Grizzly's manual lists it as 240V single-phase only, with a 9 amp draw on a 15 amp circuit and a NEMA 6-15 plug. The G1028Z2 in the same manual is the model that runs on 120V.
How do you clean the G0548ZP canister filter?
Move the cleaning handle on top of the canister back and forth with the machine off. Dust falls into the lower bag. Grizzly says not to use compressed air or liquids, which damage the pleats. A soft brush on the inside is the only other method it allows.
What replacement bags and filter fit the G0548ZP?
Grizzly lists the T20543 plastic bottom bag and the H5783 1 micron replacement canister for this model.
How long does G0548ZP assembly take?
Grizzly's data sheet lists 45 minutes. Setting the collector body on the base is a two person step, so have a helper for that part.